The following tutorial is going to explain how to easily sell physical and/or downloadable/virtual/digital products on your WordPress Website! This can include virtually any product you can think of such as t-shirts, music/audio files, iPhone cases, ebooks, online guides and so much more. This solution only works if you have a self-hosted WordPress (WordPress.org) Website installed and have access to your WordPress website administration panel (all you need is a user/pass to login).
We will use WooCommerce as your shopping cart and PayPal as your credit card processor. There are ZERO monthly fees involved. Just pay regular PayPal transaction fees for any products sold. If you haven’t already go to PayPal.com and signup for a PayPal account because you will need a place for all your funds to go to from all the products you are going to sell!
There are no other expenses associated with setting up your shopping cart this way. So if you are just starting out or just want to test if your products sell then this is the best and cheapest option I have found online. WooCommerce is the most popular ecommerce platform on the internet. It is an incredibly powerful and free online shopping cart. There have been over 8.5 million downloads and over 29% of all online stores are using WooCommerce via WordPress.
If you follow all the directions below you will be able to have your online shop up and running in as little as 1 hour!
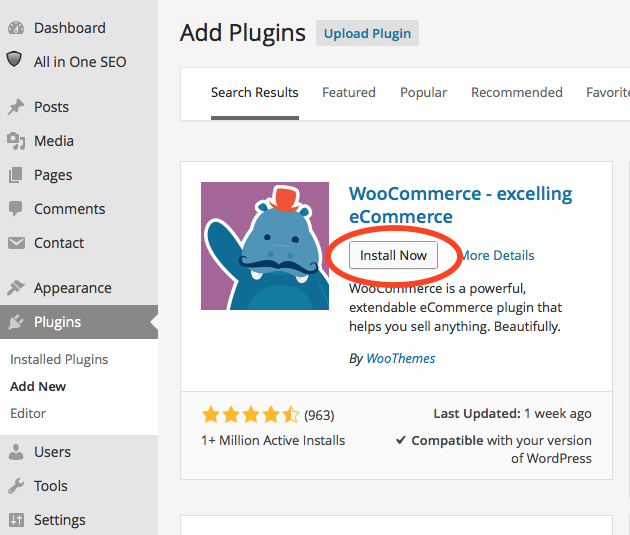
STEP 1: Install Woocommerce on WordPress
Login to the administration panel of your WordPress Website and go to Plugins –> Add New. Search for “Woocommerce” and click “Install Now”. Make sure that you Activate the Plugin when prompted.

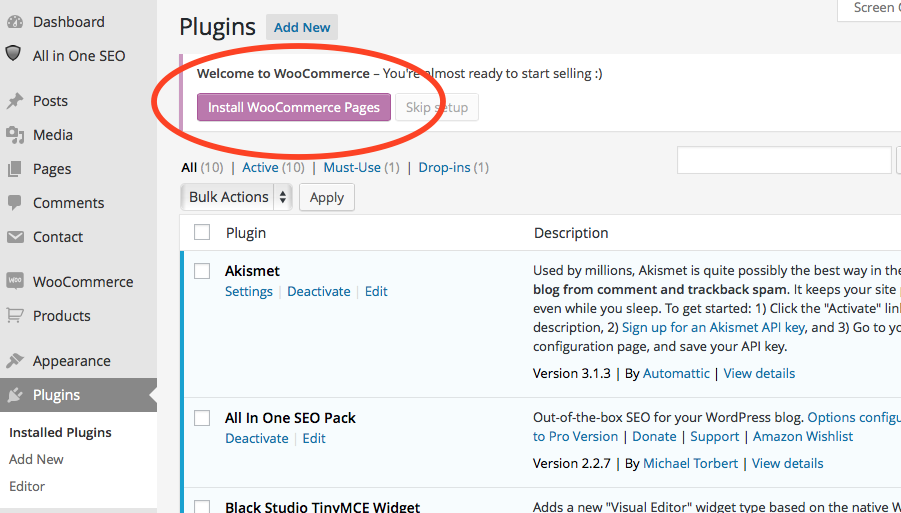
STEP 2: Install Woocommerce Pages
Once the Woocommerce plugin is installed you will see a banner that says Welcome to Woocommerce – You’re almost ready to start selling 🙂 Click on the purple button that says “Install WooCommerce Pages.
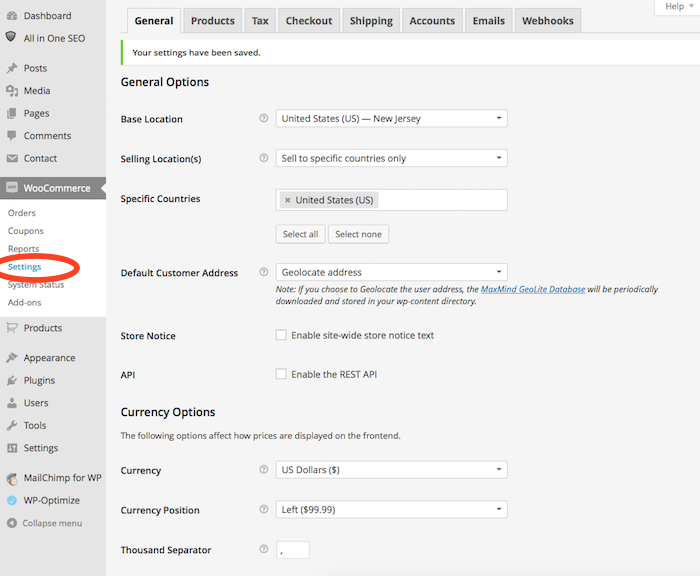
Step 3: Woocommerce Settings
Once you have installed the Woocommerce Pages now click on the new Woocommerce tab that appears on the left hand side of WordPress and click on “Settings”. Make sure to choose all the correct settings in General Options such as your Base Location, which countries you are selling to and which currency you would like to use. Also make sure to uncheck Enable the REST API in order to start selling immediately.
WooCommerce Product Settings
Click on the next top tab labeled “Products” and make sure the correct weight and dimension units for your products are selected. If you aren’t sure or don’t want to mention this for your products then leave this area as it is. Same with the Product Reviews area.
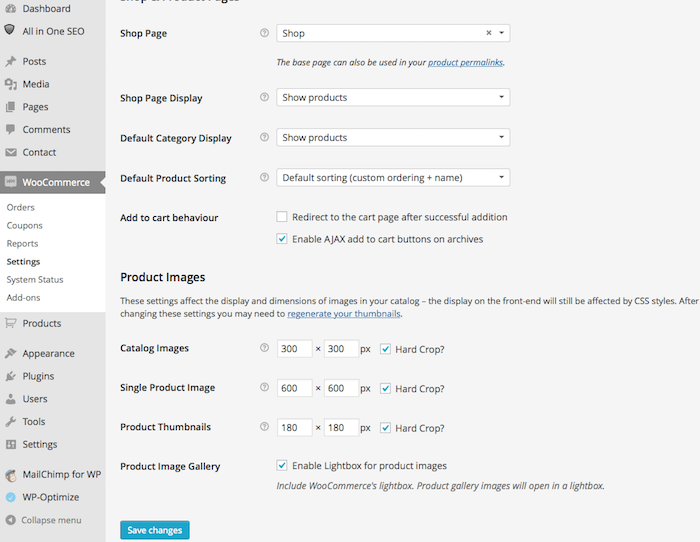
Next go to Display (sub link underneath Products tab) and make sure the Product Images section displays the sizes of the images you are going to show in your shop. Make sure these sizes match your product sizes BEFORE uploading your images. Otherwise you will have to regenerate all the image sizes which is usually a bit of a pain. Make sure to click Save Changes if you make any edits to this page.
WooCommerce Tax Settings
Go through the Tax Settings and make sure to select everything that applies to your shop. Make sure to click Save Changes if you make any edits. This goes for all the settings below as well.
WooCommerce Checkout Settings
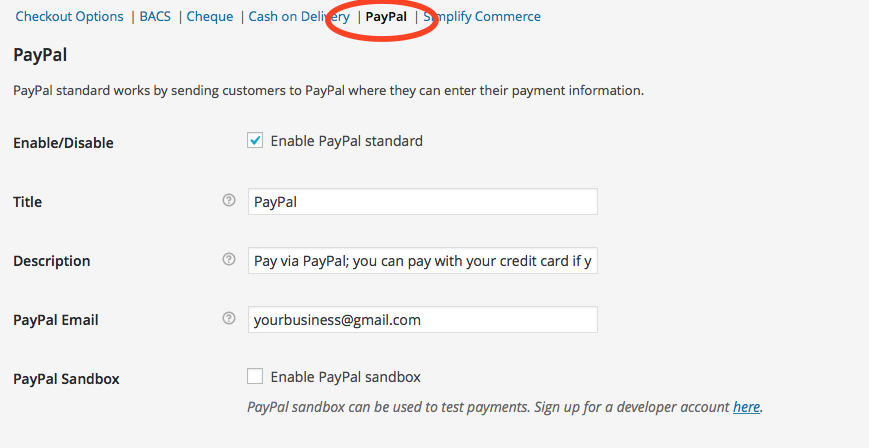
Click on the Checkout Tab and you will see several options right below it such as BACS | Cheque | Cash on Delivery | PayPal | etc. Usually to start selling products right away you should disable all the other options and go straight to enabling the PayPal option. Click on each tab and where it says “Enable/Disable” Disable all of the options except PayPal.
Once you go to the PayPal tab go to the section where it says “PayPal Email” and enter in the PayPal email you would like to receive all the payments from your sales. This is the only required area you will need to enter your PayPal information. There are additional Advanced options you can look into but they aren’t necessary to start selling products.
You can use premium plugins in order to sell with a merchant service provider other than PayPal. Many times those premium plugins will require you to make monthly payments and transaction fees. PayPal will not charge a monthly fee and will only charge their standard 2.9% per transaction. There are also other PayPal options that you can select if you have a PayPal merchant account. However this is the absolute easiest way to start selling products today! And your customers will be able to pay you with credit cards (it will just be processed through PayPal)
WooCommerce Shipping Settings
The default shipping settings within WooCommerce are pretty weak. Go into each option and disable them. Keep only the Free Shipping enabled or the Flat Rate enabled. (Only have one of these enabled) If you do Free Shipping then this is super easy and you are done. (This is the perfect option if you are selling a digital product that doesn’t need to be shipped like an ebook or online manual).
If you are selling a physical item that needs to be shipped then you can also leave the Free Shipping or enable the Flat Rate Shipping option and enter in your shipping cost/order (ie. $9.99 per order). If you want to have more complex shipping (based on weight, location etc) then you need to install a WooThemes Shipping plugin (if you would like me to do an in-depth tutorial on WooCommerce shipping options then leave a comment below!) I recommend to try to avoid buying expensive plugins until you have sold a few products. Once you gain traction then invest in a plugin.
WooCommerce Account Settings
Not much to change here. You can scroll down to Registration Options and select the options that best suite your shop.
WooCommerce Email Settings
Here you can customize the emails your customers will get once they purchase a product from your online store. Add in the File URL of your logo to the Header Image area and change the colors to match your website. These options are pretty self explanatory. Once you are done with this its time to list your Products!
Step 4: Add your Products in Woocommerce!
(Step 5 will show you how to edit the option for a Virtual/Digital/Downloadable Product)
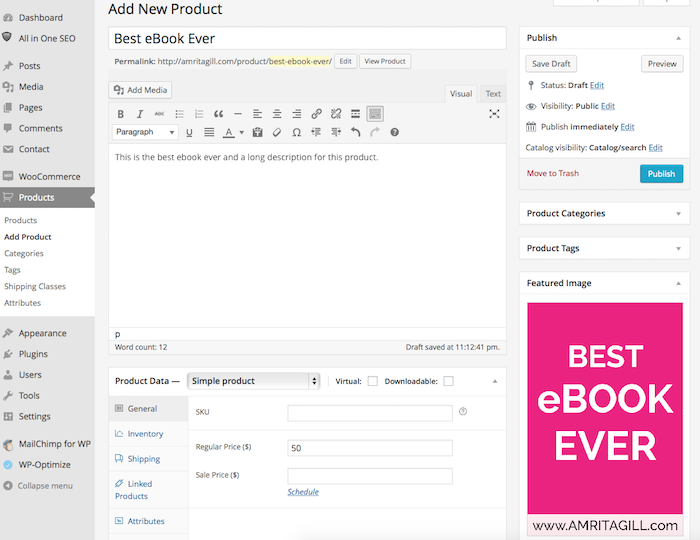
Go to the left side of your WordPress admin panel and click on “Products” –> Add Product
Now if you have a simple physical product without variations (different colors, sizes, and other options) then this is going to be really easy.
Just Enter in the Product Name at the top, add in a Long Product Description in the large white box, enter in a Product Category at the right hand side (optional) and enter in the Regular Price in the Product Data box. Also make sure to upload a “Featured Image” and any additional images you have into the “Product Gallery“.
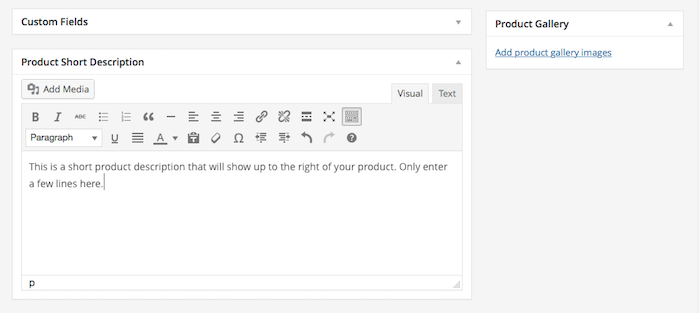
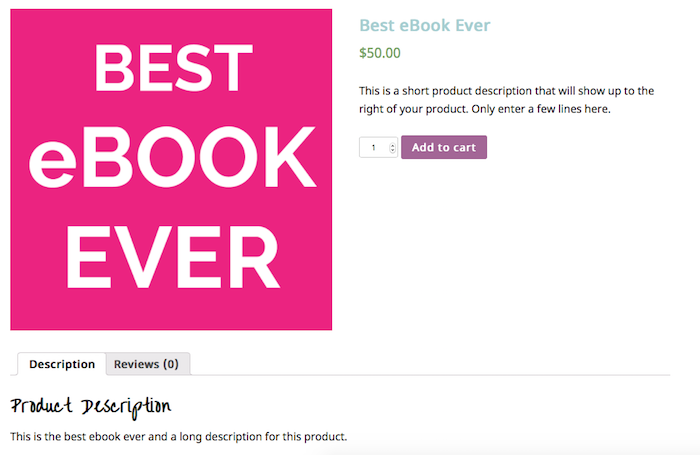
Below I show an example of adding in a Product called “Best eBook ever”. I added in the title, long description, a short description (Scroll down to the bottom where it says “Product Short Description” which is another option to add more information to your product description page). This area will appear to the right of your product on your individual product page. This is a great place to sum up your product and to sell someone on the benefits of purchasing this product.
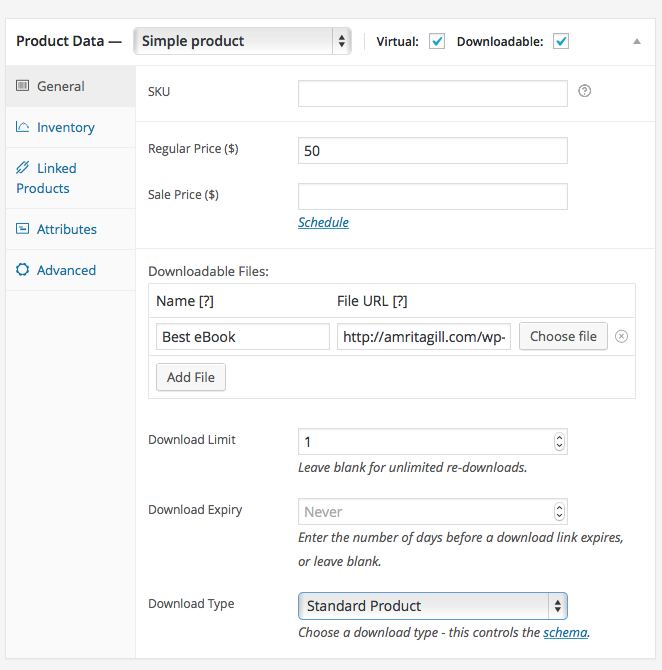
Step 5: Add in a Digital Downloadable Product
This section is if you are selling a digital/downloadable/virtual product that the customer will need to download. Please scroll to the Product Data section and select Virtual and Downloadable. Then enter in the fields below and also upload the file the customer will receive once they have paid for the item. See below:
Once you have entered all the information into Product Data then Scroll Up on your page and make sure to click “Publish” to make your product live!
Here is what the live page will look like:
(The product page will embed itself into your website page. This is pretty cool because it will fit in nicely with your existing website.)
In order to change a few of the default WooCommerce colors to match your website then download this free plugin: WooCommerce Colors. This plugin will allow you to change the Add to Cart button as well as the green price to better match your website.
And that’s it! Repeat the Add to Product Steps in order to add more Products to your Woocommerce WordPress store to populate your store with more products. If you want to add premium and custom features to your website shop and shopping cart then consider hiring a WordPress/WooCommerce designer and developer and/or purchase premium WooCommerce plugins.
To view all the products added to your shop then go to www.yourdomain.com/shop
To view your checkout page go to: www.yourdomain.com/checkout
To view the account page go to www.yourdomain.com/my-account
I hope this WooCommerce tutorial has helped you to easily start selling products through your existing WordPress Website!
Your Comments
Was this WordPress/Woocommerce Shop Setup tutorial helpful? What products are you selling online? Please let me know in the comments below!